SELF SUFFICIENCY II ASS101

Self- sufficiency: save on food bills and ensure a higher quality and healthier diet for you and your family.

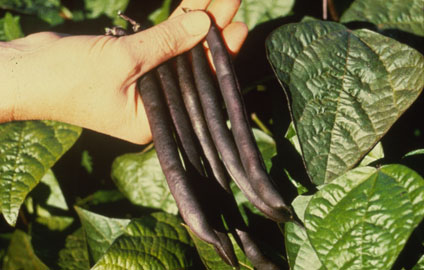
Learn to be self sufficient with your food.You learn about nutrition and how to balance your diet, as well as how to produce, process, store, and use different types of food. This includes berries, nuts, milk, cheese, eggs, bread making, preserves, & dried food. Cooking, freezing, drying, bottling, making bread, planning a vegetable garden to give produce all year round, and lots more are covered during the ten lessons.

Grow, harvest, preserve foods; for all year supply

If you want every luxury that modern society can offer, then you may need more than what a normal garden can produce, but if you are pragmatic and willing to make a few compromises, you may be amazed at what you can achieve.
 
Growing the food you want to eat may be different to growing what you need to eat. Growing you needs will usually be more achievable and less costly in terms of money and time.

COURSE STRUCTURE

This course deals with food; what to eat, how to produce it, how to store it; and how to prepare it. There are ten lessons in this course, each requiring about 10 hours work.

The content of each of the lessons is outlined below:
  1. Diet & Nutrition   Introduction to good health, basic nutrition, food allergies, food combining, a well balanced diet.
  2. Establishing a Kitchen Garden  Deciding food plants that can be grown in your garden, designing a productive garden.
  3. Vegetables   Easy to grow vegetables, long cropping vegetables, culture for specific types of vegetables.
  4. Fruit   Cultural techniques for different types of fruits & berries, cross pollination
  5. Bottling   Equipment & techniques for jelly making & bottling.
  6. Freezing & Drying   Harvesting and preserving techniques including freezing & drying
  7. Producing Milk & Eggs   Milk from cows, sheep & goats, developing an egg production system, making cheese and yoghurt.
  8. Growing & Cooking with Herbs   Selection and cultivation of culinary herbs, drying herbs, recipes for cooking with herbs.
  9. Egg & Cheese Cookery    Storage and use of eggs & cheese, distinguishing different types of cheese, cooking with eggs & cheese.
  10. Grain   Growing sprouts, cereals, baking bread, etc.

Duration: 100 hours

Aims
  • Explain the importance of good diet and nutrition to good health
  • Discuss the potential for increasing self sufficiency by growing your own food in a kitchen garden.
  • Describe the potential and appropriate procedures for vegetable growing in your area.
  • Describe the potential for fruit growing and appropriate fruit growing procedures for your locality.
  • Describe the process of practices like bottling to extend the shelf life of produce.
  • Explain the process of practices like freezing and drying to extend the shelf life of produce.
  • Describe the principles of animal production and processing animal products, where someone is seeking to improve dietary self sufficiency.
  • Describe growing and cooking with herbs, where someone is seeking to improve dietary self sufficiency.
  • Describe the use of eggs and cheese where someone is seeking to improve dietary self sufficiency.
  • Describe the use of grains in a situation where someone is seeking to improve dietary self sufficiency.

Make Your Own Drinks

There are lots of things that you might not have even thought about can grow in your garden, rather than spending hard earned money on buying.
Consider drinks. How much do you spend on buying coffee, tea, soft drink, milk and other drinks. Most of these; or good substitutes, can be readily produced at home; and in doing so, you can have healthier, chemical free drinks, that do not cost anything to produce.

This course is all about learning how to be self sufficient with what you eat (and drink).

Example -Consider Herbal Teas

If growing your own herbs for use in teas, there are some points worth noting. Firstly, some herbs are annuals whereas others are perennials. Perennials are usually the woody stemmed types like sage, thyme, oregano and rosemary. Annuals are fleshier like coriander and basil. However, where you live can influence the lifespan of herbs. Many annual types do better in warmer regions where they can last indefinitely. In colder areas they are unlikely to withstand the winter temperatures and will die off.

Use herbs that are species plants rather than cultivated varieties – the latter are thought to have fewer active constituents (in some cases). 

The quality of the herbs is also determined in part by your local climate. Most herbs need a lot of sunlight in order to promote oil production. It is the essential oils in herbs which produces their unmistakable aromas, and which provides flavour when ingested in food or infused in teas. If you are growing herbs in a cooler climate you will therefore need to position them where they can benefit from the most exposure to sunlight 

Many perennial herbs do not need particularly rich soils, but most thrive in a warm and sunny position.  A few herbs such as rocket, parsley, mustard, and the mints, which make wonderfully refreshing teas, prefer a semi-shaded spot and moist soils. With some herbs, like the mints, there are also many different species, each with their unique taste. Why not grow several different types for a range of different teas?

Mints also have very invasive root systems, as do some others like horseradish, so they are best grown in containers to stop them from taking over garden beds. Containers are ideal for many other herbs too because it means you can move the containers to catch sunlight, and you can place them in the shelter of a greenhouse over winter if needs be. It is usually best to grow individual species in separate containers if space permits, since they may grow at different rates. Annuals and tender perennials grown in the open ground can be protected with a cloche or cold frame over winter.   

Apart from those needing moist conditions don’t over-water the herbs – this makes the leaves watery and in turn reduces their effectiveness as herbal tea or herbal medicine.

Some Popular Plants for Teas

  • Herbs - lemon balm, chamomile, fennel, mint, catnip, oregano, sage, thyme, parsley, rosemary, chives, dill, lavender, basil, lemongrass, echinacea 
  • Trees and shrubs (leaves) - blackberry, raspberry, Backhousia citriodora, birch, lemon myrtle, lemon or orange verbena, linden (Tilia cordata).
  • Trees and shrubs (flowers) - rose, elderberry, citrus, hibiscus. 
  • Garden weeds - dandelions, nettles, goldenrod (Solidago spp.), ground ivy (Glechoma hederacea), purslane (Portulaca oleracea), wild mustard, red clover, milk thistle (Silybum marianum).
  • Annuals and perennials – Marigold (Calendula officinalis), chrysanthemum (Chrysanthemum indicum or C. morifolium) nasturtium, pansies, violets, honeysuckle (flowers only), carnations (Dianthus caryophyllus), alliums, hollyhock (Althaea rosea), sunflower.

How to Make Teas

Teas make use of different plant parts, so if your favourite herb suddenly goes to flower, don't despair - you can use those flowers. The best plant parts for teas are the softer tissues. These include the fleshy growing tips of shoots, leaves, and flowers. The roots and toughened woody stems take more time and effort to break down, so are not us useful for a quick brew. Besides, if you want to keep the plant as a source of foliage, you won't want to dig out its roots.  

To make a tea all you need is your herbal plant parts and boiling water.  As a general rule of thumb, add one cup of water to one tablespoon of herbs. That's around 250ml of water to one ounce, or 28 grams, of herb. For less aromatic herbs you could go up to 3 tablespoons. Pour boiling water onto the herb and leave it to steep so as to extract the flavour, or essence, of the herb into the water. If you use a pan to heat the water rather than a kettle, place the herbs in a separate pan and pour the water over them. Do not return the pan to the heat of the stove - just leave the herbs to soak. 

For a typical tea, the herbs need to steep in the water for around half an hour to an hour to get the optimal amount of extract. However, this will vary depending on how soft the plant tissue is, and the herb being used. If, like most people, you prefer to drink a hot tea you may wish to consume it before it cools down too much. If you don't mind drinking it cold, then you can allow it to infuse for longer. Just be aware that the longer you leave i